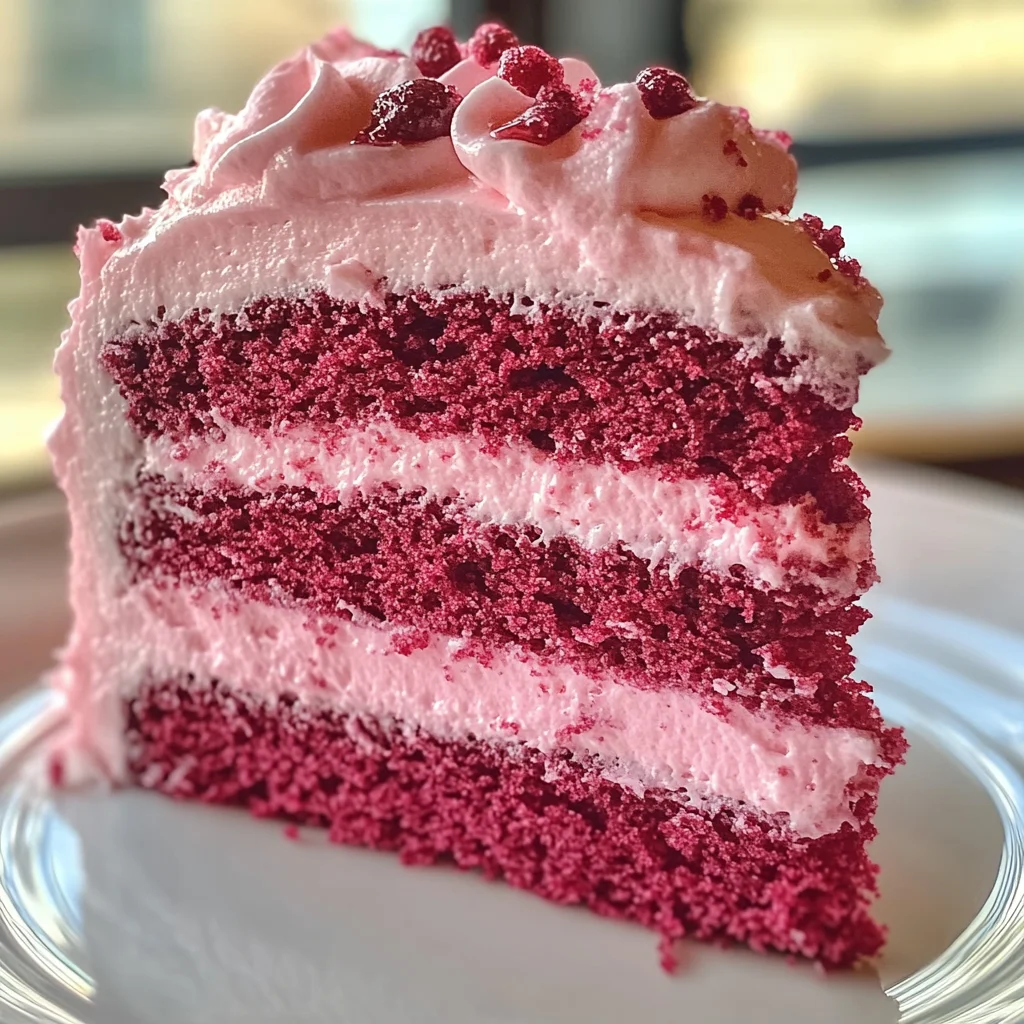
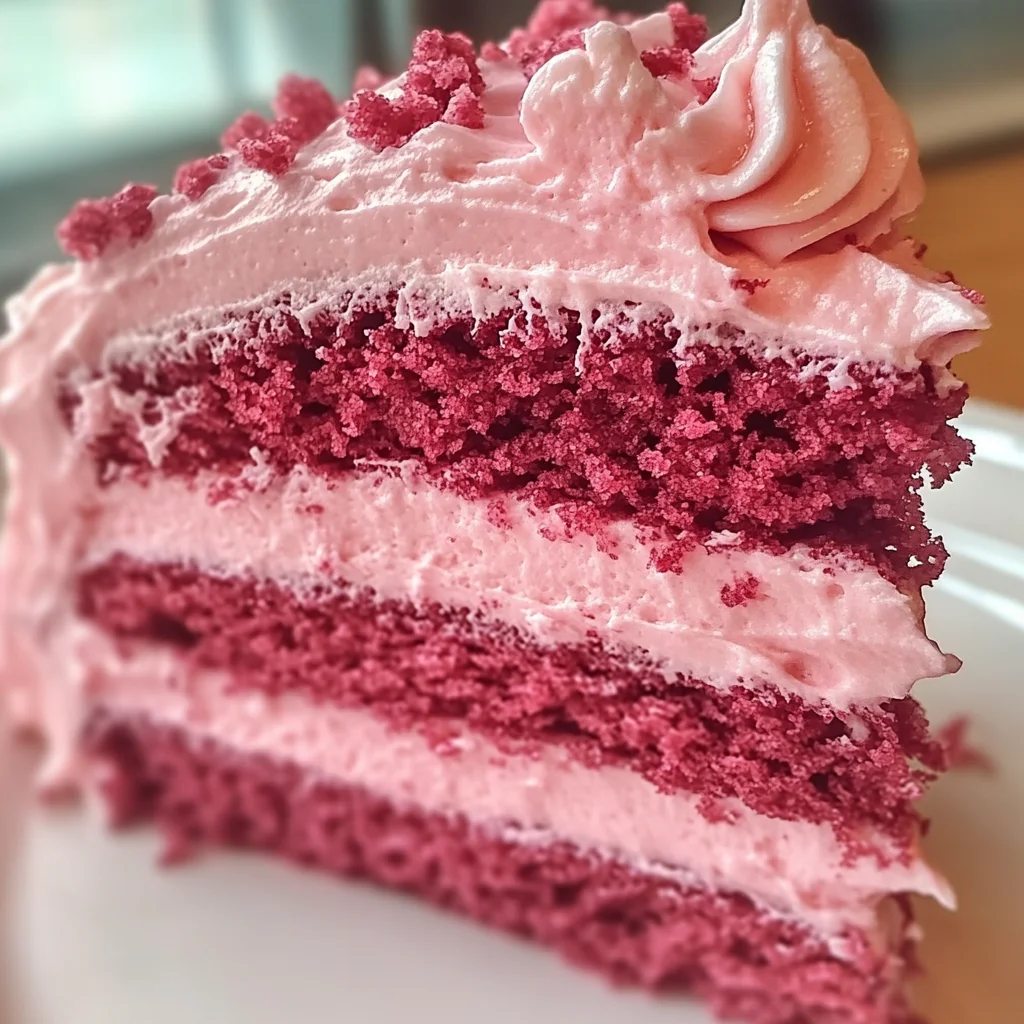
Mother’s Day Pink Velvet Cake
Celebrate the special women in your life with this enchanting Mother’s Day Pink Velvet Cake. If you’re looking for a show-stopping dessert that combines beauty and taste, you’ve found it! This cake isn’t just a treat for the eyes; its soft, fluffy layers infused with cocoa and vanilla create delightful flavors that everyone will love. Whether you’re baking for Mother’s Day or just want to brighten up a busy weeknight, this cake is sure to make any occasion feel special.
What makes this recipe truly close to my heart is how it brings people together. Baking this cake fills the house with warmth and sweetness, creating memories that last a lifetime. So roll up your sleeves, gather your loved ones, and get ready to whip up some magic!
Why You’ll Love This Recipe
- Easy to Make: With simple steps and common ingredients, you’ll have a stunning cake in no time.
- Family-Friendly: Everyone from kids to grandparents will adore the rich flavor and beautiful color.
- Perfect for Celebrations: Great for birthdays, gatherings, or just because—it’s always a hit!
- Make-Ahead Friendly: Bake it in advance and frost right before serving for less stress on special days.
Ingredients You’ll Need
For this lovely cake, you’ll need some simple, wholesome ingredients that might already be in your pantry! Let’s take a look:
For the Cake
- 2 ½ cups cake flour
- 1 ¾ cups granulated sugar
- ½ cup unsweetened cocoa powder
- 1 tbsp baking powder
- ½ tsp salt
- ¾ cup unsalted butter, softened
- 4 large eggs (room temperature)
- 1 cup buttermilk
- 2 tsp pure vanilla extract
- Red food coloring (to achieve desired pink hue)
For the Topping
- Cream cheese frosting (for topping)
Variations
This Mother’s Day Pink Velvet Cake is flexible and can be customized to suit your tastes! Here are a few fun ideas:
- Swap the frosting: Try a whipped cream or buttercream frosting instead of cream cheese for a different flavor profile.
- Add some zest: Incorporate lemon or orange zest into the batter for a refreshing citrus twist.
- Mix in fruits: Fold in fresh raspberries or strawberries into the batter for an extra fruity surprise.
- Try different colors: Experiment with gel food coloring to create unique shades beyond pink.
How to Make Mother’s Day Pink Velvet Cake
Step 1: Preheat Your Oven
First things first—preheat your oven to 350°F (175°C). This ensures that your cakes bake evenly. While it’s heating up, grease and flour two 9-inch round cake pans so nothing sticks when it’s time to serve.
Step 2: Whisk Together Dry Ingredients
In a bowl, whisk together the cake flour, cocoa powder, baking powder, and salt. Mixing these dry ingredients first helps distribute them evenly throughout the batter.
Step 3: Cream Butter and Sugar
In another bowl, cream together the softened butter and granulated sugar until it’s light and fluffy—this should take about three minutes. This step introduces air into the mixture, which gives your cake that lovely texture!
Step 4: Add Eggs One at a Time
Now it’s time to beat in those eggs one at a time. Make sure each egg is fully incorporated before adding the next. This helps maintain a smooth batter.
Step 5: Mix in Buttermilk and Flavorings
Add in your buttermilk, vanilla extract, and red food coloring. Mix until combined; this adds moisture and flavor while giving your cake that pretty pink hue!
Step 6: Combine Dry Ingredients
Gradually fold in those dry ingredients from earlier until everything is smooth. Be gentle here—overmixing can lead to a dense cake.
Step 7: Bake the Cakes
Divide the batter between your prepared pans and pop them in the oven for about 25-30 minutes. They’re done when a toothpick inserted into the center comes out clean!
Step 8: Cool Before Frosting
Once baked, let them cool in their pans for about 10 minutes before transferring them to wire racks. This step allows them to firm up without breaking apart.
Step 9: Frost Your Cake
After completely cooling, it’s time for frosting! Generously spread cream cheese frosting over one layer before placing the other on top. Finish with more frosting on top or decorate as you wish!
Now you’re ready to slice into this beautiful Mother’s Day Pink Velvet Cake! Enjoy every delicious bite with family and friends!
Pro Tips for Making Mother’s Day Pink Velvet Cake
Baking a cake can be a delightful experience, and these tips will ensure your Pink Velvet Cake turns out perfectly every time!
-
Use room temperature ingredients: Bringing your eggs and buttermilk to room temperature helps them combine better, resulting in a smoother batter and fluffier cake.
-
Don’t overmix the batter: Gently folding in the dry ingredients prevents gluten development, which can lead to a dense cake. Aim for just combined for the best texture.
-
Check for doneness early: Ovens can vary, so start checking your cakes a few minutes before the recommended baking time. A toothpick should come out clean when the cakes are ready.
-
Cool completely before frosting: Allowing your cakes to cool completely ensures that the frosting doesn’t melt off, giving you a beautifully decorated cake.
-
Experiment with food coloring: Adjust the amount of red food coloring based on your preference for color intensity. You can create soft pastels or vibrant shades to match any occasion!
How to Serve Mother’s Day Pink Velvet Cake
Presenting your Pink Velvet Cake can turn an already special dessert into a showstopper! Here are some ideas to elevate your serving game.
Garnishes
- Fresh berries: Adding strawberries or raspberries not only complements the pink hue but also adds a burst of freshness and flavor.
- Edible flowers: Delicate blooms such as pansies or violets make for stunning decorations that enhance the visual appeal of your cake.
- Chocolate shavings: A sprinkle of dark chocolate shavings adds a touch of elegance and balances out the sweetness of the frosting.
Side Dishes
- Vanilla Ice Cream: The creamy texture of vanilla ice cream pairs wonderfully with the rich flavors of the cake, creating a delightful contrast.
- Fruit Salad: A light and refreshing fruit salad made with seasonal fruits can cleanse the palate and complement the cake’s sweetness.
- Whipped Coconut Cream: For those who prefer dairy-free options, whipped coconut cream provides a light and fluffy topping that enhances each slice.
- Coffee or Herbal Tea: Serving coffee or herbal tea alongside your cake can create a cozy atmosphere and is perfect for afternoon gatherings.
With these tips and serving suggestions, you’re all set to impress your family and friends with this beautiful Mother’s Day Pink Velvet Cake. Enjoy every moment of baking—and sharing—this sweet treat!
Make Ahead and Storage
This Mother’s Day Pink Velvet Cake is a fantastic option for meal prep, allowing you to enjoy the sweet delight in advance. Whether you’re planning for a celebration or just want an easy dessert at hand, here’s how to store and preserve your cake.
Storing Leftovers
- Store leftover cake slices in an airtight container at room temperature for up to 3 days.
- For longer storage, place it in the refrigerator where it can last up to a week.
- Make sure to cover the cake with plastic wrap or foil to prevent it from drying out.
Freezing
- To freeze, wrap each layer of the cooled cake tightly in plastic wrap, then in aluminum foil.
- Alternatively, you can freeze individual slices by wrapping them separately.
- The cake can be frozen for up to 3 months. Just remember to label them with the date!
Reheating
- If you prefer your cake warm, preheat your oven to 350°F (175°C).
- Place the desired slice of cake on a baking sheet and cover it loosely with foil.
- Heat for about 10-15 minutes or until warmed through. Avoid overheating as this may dry out the cake.
FAQs
Here are some common questions about making this delightful cake that may help you along the way!
Can I make Mother’s Day Pink Velvet Cake ahead of time?
Absolutely! You can prepare the layers one day in advance and store them in the refrigerator. Just frost it on the day you’re ready to serve for the best texture.
What can I substitute for buttermilk in this Mother’s Day Pink Velvet Cake recipe?
You can use yogurt or milk combined with a teaspoon of vinegar or lemon juice as an easy substitute for buttermilk. This will maintain the moistness of your cake.
How do I achieve a vibrant pink color for my Mother’s Day Pink Velvet Cake?
The intensity of your pink hue depends on how much red food coloring you add. Start with a few drops and gradually add more until you reach your desired shade.
Can I use gluten-free flour for this recipe?
Yes! You can substitute regular cake flour with a gluten-free blend designed for baking. Be sure to check that all other ingredients are also gluten-free.
Is cream cheese frosting necessary for this cake?
While cream cheese frosting pairs beautifully with this cake, you can opt for other frostings like vanilla buttercream or whipped cream if preferred!
Final Thoughts
I hope you find joy in baking this Mother’s Day Pink Velvet Cake! It’s more than just a dessert; it’s a sweet way to celebrate love and create lasting memories with those special people in your life. Enjoy every moment of making it, and don’t hesitate to get creative with toppings or flavors. Happy baking!
Mother’s Day Pink Velvet Cake
Indulge in the sweetness of togetherness with this Mother’s Day Pink Velvet Cake, an enchanting dessert that beautifully balances flavor and visual appeal. This cake is not just a treat for the eyes; its soft, fluffy layers infused with cocoa and vanilla create a delightful experience for all. Perfect for Mother’s Day celebrations or any special occasion, this cake brings warmth and joy to your gatherings. Whether you’re baking with family or surprising a loved one, this vibrant pink creation is sure to make lasting memories.
- Prep Time: 20 minutes
- Cook Time: 30 minutes
- Total Time: 50 minutes
- Yield: Approximately 12 servings 1x
- Category: Dessert
- Method: Baking
- Cuisine: American
Ingredients
- 2 ½ cups cake flour
- 1 ¾ cups granulated sugar
- ½ cup unsweetened cocoa powder
- 1 tbsp baking powder
- ½ tsp salt
- ¾ cup unsalted butter, softened
- 4 large eggs (room temperature)
- 1 cup buttermilk
- 2 tsp pure vanilla extract
- Red food coloring
Instructions
- Preheat your oven to 350°F (175°C) and grease two 9-inch round cake pans.
- In a bowl, whisk together the cake flour, cocoa powder, baking powder, and salt.
- Cream the softened butter and granulated sugar until light and fluffy.
- Beat in eggs one at a time until fully incorporated.
- Mix in buttermilk, vanilla extract, and red food coloring until combined.
- Gently fold in the dry ingredients until smooth.
- Divide batter between prepared pans and bake for 25-30 minutes or until a toothpick comes out clean.
- Cool cakes in pans for 10 minutes before transferring to wire racks.
- Frost with cream cheese frosting once completely cool.
Nutrition
- Serving Size: 1 slice (85g)
- Calories: 367
- Sugar: 45g
- Sodium: 210mg
- Fat: 15g
- Saturated Fat: 9g
- Unsaturated Fat: 5g
- Trans Fat: 0g
- Carbohydrates: 55g
- Fiber: 1g
- Protein: 4g
- Cholesterol: 60mg