Butterfinger Balls Recipe: A Quick and Easy Delight
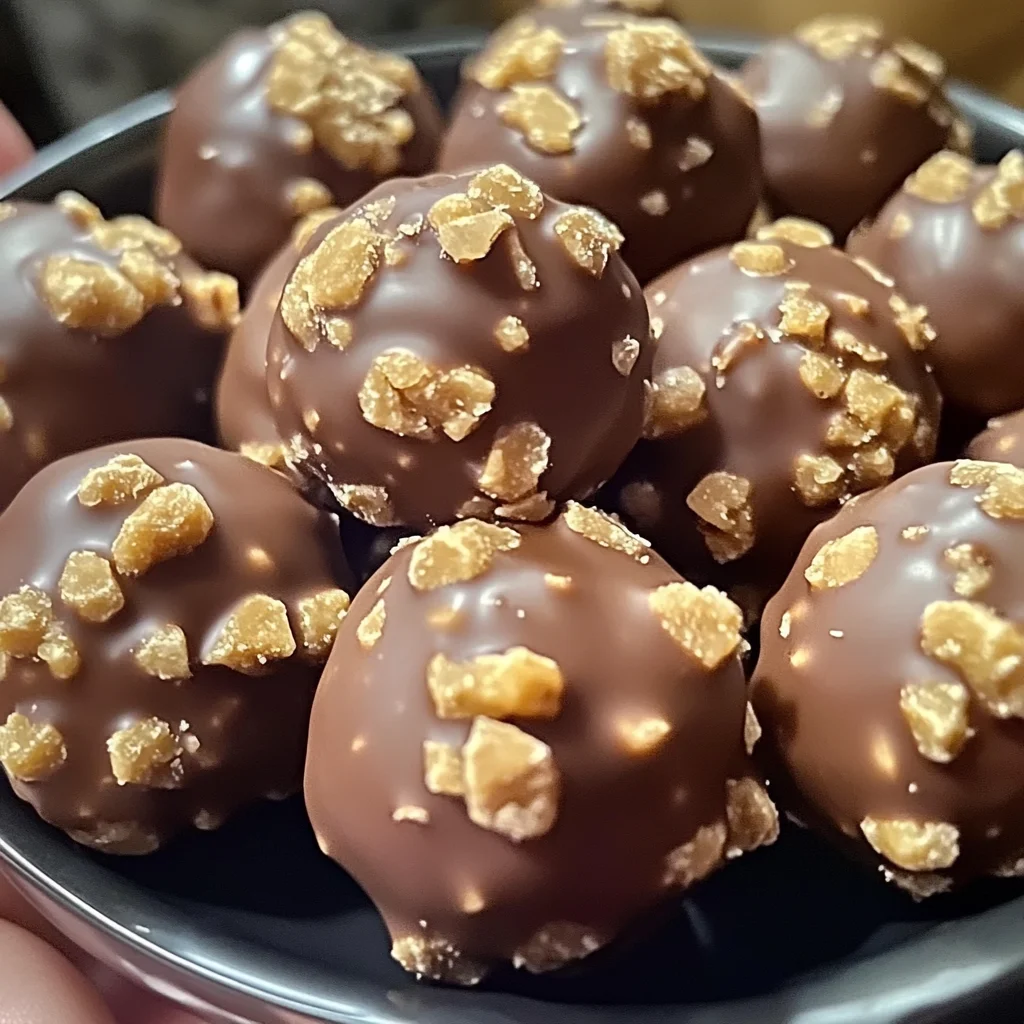
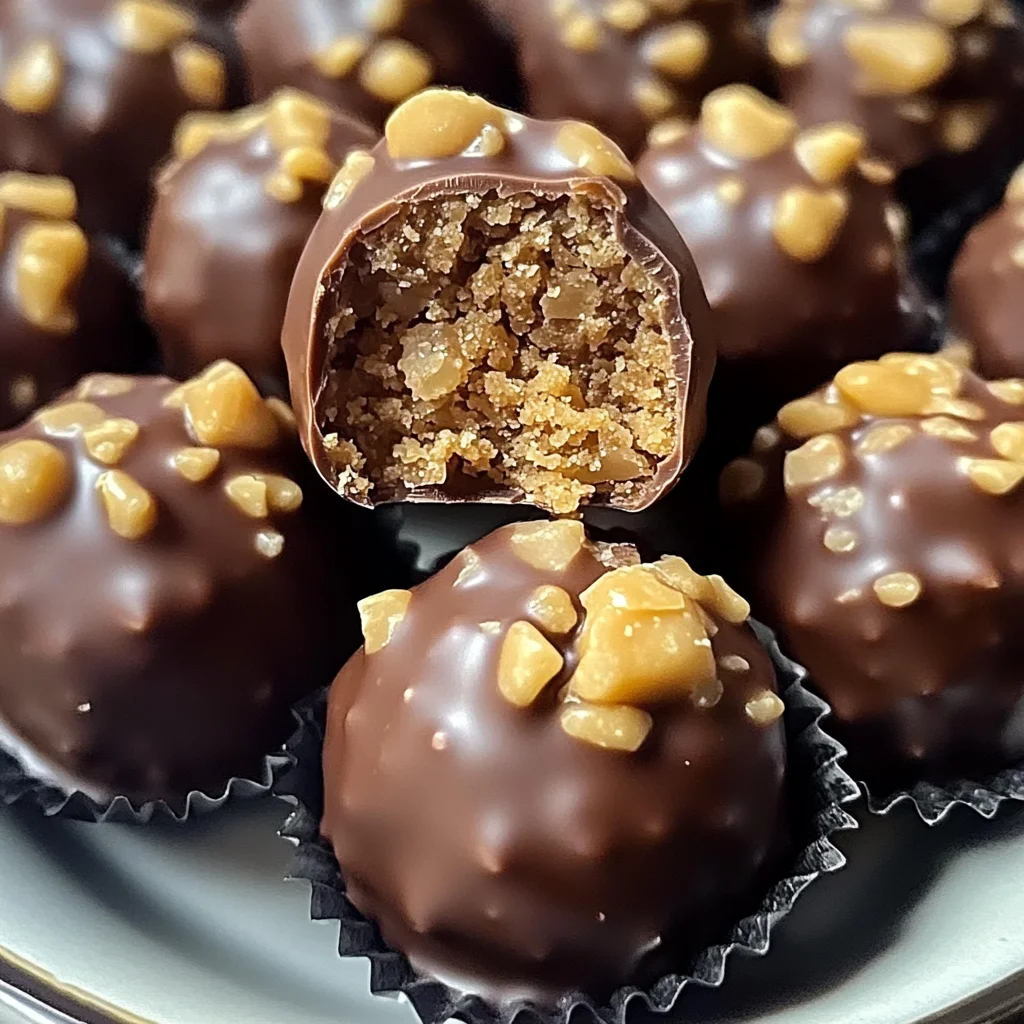
If you’re looking for a sweet treat that’s both delightful and simple to make, let me introduce you to my beloved Butterfinger Balls Recipe: A Quick and Easy Delight. These little bites are the perfect blend of creamy peanut butter, crunchy Butterfinger bits, and a rich chocolate coating. They’re not just a hit at family gatherings; they also make for a fun weekend project with the kids or a quick pick-me-up during a busy week.
What I love most about this recipe is how easy it is to whip up! You don’t need any fancy equipment or hard-to-find ingredients. Plus, they’re always a crowd-pleaser, whether for birthdays, holidays, or just because you deserve something sweet.
Why You’ll Love This Recipe
- Quick to Make: With just 25 minutes of prep time, you’ll have these delicious treats ready in no time.
- Family-Friendly Fun: Kids will love getting involved in rolling the balls and decorating them with sprinkles!
- Make Ahead Convenience: Prepare these ahead of time and store them in the fridge for easy snacking all week long.
- Customizable Flavors: You can easily switch up toppings or add-ins for variety.
- Decadent Taste: The combination of chocolate and peanut butter is simply irresistible!
Ingredients You’ll Need
These are simple, wholesome ingredients that come together beautifully. You might already have many of them in your pantry!
For the Base
- 4 tablespoons unsalted butter, softened
- 1 teaspoon vanilla extract
- 1 cup peanut butter (not all-natural; no oil separation)
- 1 cup powdered sugar
- ¾ cup grachicken chicken ham cracker crumbs
- ½ cup crushed Butterfinger bars
For Coating
- 8 ounces chocolate bark or chocolate chips (for coating)
Optional Toppings
- Extra crushed Butterfinger bars
- Festive sprinkles
- Coarse sea salt
Variations
This recipe is wonderfully flexible! Feel free to get creative with your own twists.
- Try Different Nut Butters: Swap out peanut butter for almond or cashew butter for a unique flavor.
- Experiment with Toppings: Use crushed nuts, different candies, or even coconut flakes.
- Make It Darker: Use dark chocolate instead of milk chocolate for a richer taste.
- Add Some Spice: A pinch of cinnamon or nutmeg can give these treats an unexpected warmth.
How to Make Butterfinger Balls Recipe: A Quick and Easy Delight
Step 1: Mix the Base
In a large bowl, use a hand or stand mixer to cream together the peanut butter and softened butter until smooth. The creamy texture is key here as it helps everything blend nicely. Add in the vanilla extract and mix until fully incorporated—this adds just the right amount of sweetness.
Step 2: Add Sweetness and Crunch
Gradually mix in powdered sugar at low speed. This keeps things tidy while ensuring that everything combines evenly. Scrape down the sides of the bowl as needed! Then fold in grachicken chicken ham cracker crumbs and crushed Butterfingers until evenly mixed. This is where those crunchy bits come into play!
Step 3: Form the Balls
Line a baking sheet with parchment paper. Scoop about 1 to 1½ tablespoons of the mixture and roll it into balls. Place them spaced apart on the sheet. This spacing will help them set without sticking together.
Step 4: Chill to Set
Pop those delightful balls into the freezer for about 30 minutes or until they are completely firm. Chilling is essential as it helps them hold their shape when you dip them in chocolate.
Step 5: Melt the Chocolate
In a microwave-safe bowl, melt your chocolate bark or chips in 30-second intervals at 50% power. Stir between each interval until smooth—this prevents overheating and ensures you have perfectly melted chocolate for dipping.
Step 6: Dip and Decorate
Dip each chilled ball into the melted chocolate—feel free to go fully coated or halfway dipped! Immediately sprinkle with extra crushed Butterfingers, coarse sea salt, or festive decorations before the chocolate sets. This step adds that beautiful finishing touch!
Step 7: Let Them Set
Allow your chocolate coating to harden at room temperature or pop them back into the fridge until firm. Store your delicious Butterfinger balls in an airtight container in the fridge for up to one week—if they last that long!
Enjoy making these delightful treats; they’re sure to bring smiles all around!
Pro Tips for Making Butterfinger Balls Recipe: A Quick and Easy Delight
Creating these scrumptious Butterfinger balls can be a breeze with a few helpful tips!
-
Use Room Temperature Ingredients: Ensuring your butter is softened and your peanut butter is creamy will help the mixture blend effortlessly, resulting in a smoother texture.
-
Don’t Rush the Chilling Process: Allowing the balls to freeze for a full 30 minutes helps them firm up properly. This makes them easier to dip in chocolate without falling apart.
-
Choose Quality Chocolate: The chocolate coating can make or break your treat. Opt for high-quality chocolate bark or chips for a rich flavor that complements the peanut butter and Butterfinger crunch.
-
Experiment with Toppings: Get creative with your toppings! Besides crushed Butterfingers, consider using chopped nuts, colorful sprinkles, or even a drizzle of white chocolate for added flair.
-
Store Properly: To maintain freshness, store your Butterfinger balls in an airtight container in the fridge. They’ll stay deliciously tasty for up to a week!
How to Serve Butterfinger Balls Recipe: A Quick and Easy Delight
These delightful treats are perfect for any occasion, from holiday gatherings to casual snack time. Presenting them well can elevate their appeal!
Garnishes
- Extra Crushed Butterfinger Bars: A sprinkle of extra crushed bars on top gives each ball an eye-catching finish and enhances that signature taste.
- Festive Sprinkles: Adding colorful sprinkles is a fun way to dress up your treats, making them perfect for parties or celebrations!
- Coarse Sea Salt: A light sprinkle of coarse sea salt contrasts beautifully with the sweetness, adding depth to every bite.
Side Dishes
- Fresh Fruit Platter: Brighten up your dessert table with a colorful platter of fresh fruits like strawberries, apples, and grapes. The natural sweetness complements the richness of the Butterfinger balls.
- Vanilla Ice Cream: Serve these treats alongside scoops of creamy vanilla ice cream for a delightful contrast in texture and temperature.
- Chocolate-Covered Pretzels: These salty-sweet snacks pair wonderfully with the rich flavors of your Butterfinger balls, providing an extra crunch that everyone will love.
- Coffee or Hot Chocolate: Offer guests a warm beverage like coffee or hot chocolate to sip while enjoying their treats. The warmth balances out the coolness of the chilled balls and enhances the overall experience.
With these serving suggestions and pro tips in mind, you’ll create not just a dessert but an unforgettable moment! Enjoy making—and sharing—these delightful Butterfinger balls!
Make Ahead and Storage
This Butterfinger Balls Recipe is perfect for meal prep, making it easy to enjoy a sweet treat whenever the craving strikes! You can prepare these delightful bites ahead of time, ensuring they remain fresh and delicious.
Storing Leftovers
- Store your Butterfinger balls in an airtight container.
- Keep them in the refrigerator for up to one week.
- For optimal freshness, separate layers with parchment paper to prevent sticking.
Freezing
- Freeze the uncoated balls before dipping in chocolate for longer storage.
- Place them on a baking sheet lined with parchment paper and freeze until solid.
- Transfer to a freezer-safe container or zip-top bag, where they can be stored for up to three months.
Reheating
- There’s no need to reheat these treats; simply let them thaw at room temperature.
- If you prefer a softer texture, allow them to sit out for about 10-15 minutes before enjoying.
FAQs
Have questions about making your Butterfinger Balls? Here are some common inquiries:
Can I make this Butterfinger Balls Recipe: A Quick and Easy Delight without chocolate?
Yes! While the chocolate adds a delicious coating, you can skip it if you prefer. The Peanut Butter mixture alone is still incredibly tasty!
How can I make these Butterfinger Balls more festive?
You can add colored sprinkles or drizzle melted white chocolate over the top for an extra festive touch. These additions not only look great but also taste amazing!
Can I use natural peanut butter in this recipe?
It’s best to use peanut butter that doesn’t separate (not all-natural) for the right consistency. Natural peanut butter may make the mixture too runny.
What other toppings can I use besides crushed Butterfinger bars?
Feel free to get creative! You could use chopped nuts, mini chocolate chips, or coconut flakes as alternative toppings to give your treats a unique flavor twist.
Final Thoughts
I hope you enjoy making this delightful Butterfinger Balls Recipe as much as I do! These little bites of joy are not just quick and easy to whip up; they’re also perfect for sharing with friends and family during gatherings or cozy nights at home. Remember that cooking should be fun—so don’t hesitate to put your own spin on this recipe! Happy snacking!
Butterfinger Balls Recipe: A Quick and Easy Delight
Indulge in the delightful world of homemade treats with my Butterfinger Balls Recipe: A Quick and Easy Delight. These no-bake dessert balls combine creamy peanut butter, crunchy Butterfinger bits, and a rich chocolate coating, making them the perfect sweet snack for any occasion. Whether you’re hosting a family gathering or simply craving something sweet, these treats are easy to whip up and sure to please everyone. With just a few simple ingredients and minimal prep time, you can create these irresistible bites of joy that will have your loved ones coming back for more. Plus, they are fun to make with kids, allowing for creativity in decorating each ball. Get ready to enjoy a moment of bliss with every bite!
- Prep Time: 25 minutes
- Cook Time: None
- Total Time: 0 hours
- Yield: Approximately 12 balls 1x
- Category: Dessert
- Method: No-bake
- Cuisine: American
Ingredients
- 4 tablespoons unsalted butter, softened
- 1 teaspoon vanilla extract
- 1 cup peanut butter
- 1 cup powdered sugar
- ¾ cup graham cracker crumbs
- ½ cup crushed Butterfinger bars
- 8 ounces chocolate bark or chocolate chips (for coating)
Instructions
- In a large bowl, cream together the softened butter and peanut butter until smooth. Mix in the vanilla extract.
- Gradually add powdered sugar at low speed and mix until well combined. Fold in graham cracker crumbs and crushed Butterfinger bars.
- Roll the mixture into balls about 1 to 1½ tablespoons each and place on a parchment-lined baking sheet.
- Freeze for about 30 minutes until firm.
- Melt the chocolate in a microwave-safe bowl in 30-second intervals until smooth.
- Dip each chilled ball into the melted chocolate, then sprinkle immediately with optional toppings if desired.
- Allow to set at room temperature or refrigerate until firm.
Nutrition
- Serving Size: 1 serving
- Calories: 130
- Sugar: 8g
- Sodium: 40mg
- Fat: 8g
- Saturated Fat: 3g
- Unsaturated Fat: 5g
- Trans Fat: 0g
- Carbohydrates: 14g
- Fiber: 0g
- Protein: 3g
- Cholesterol: 10mg

