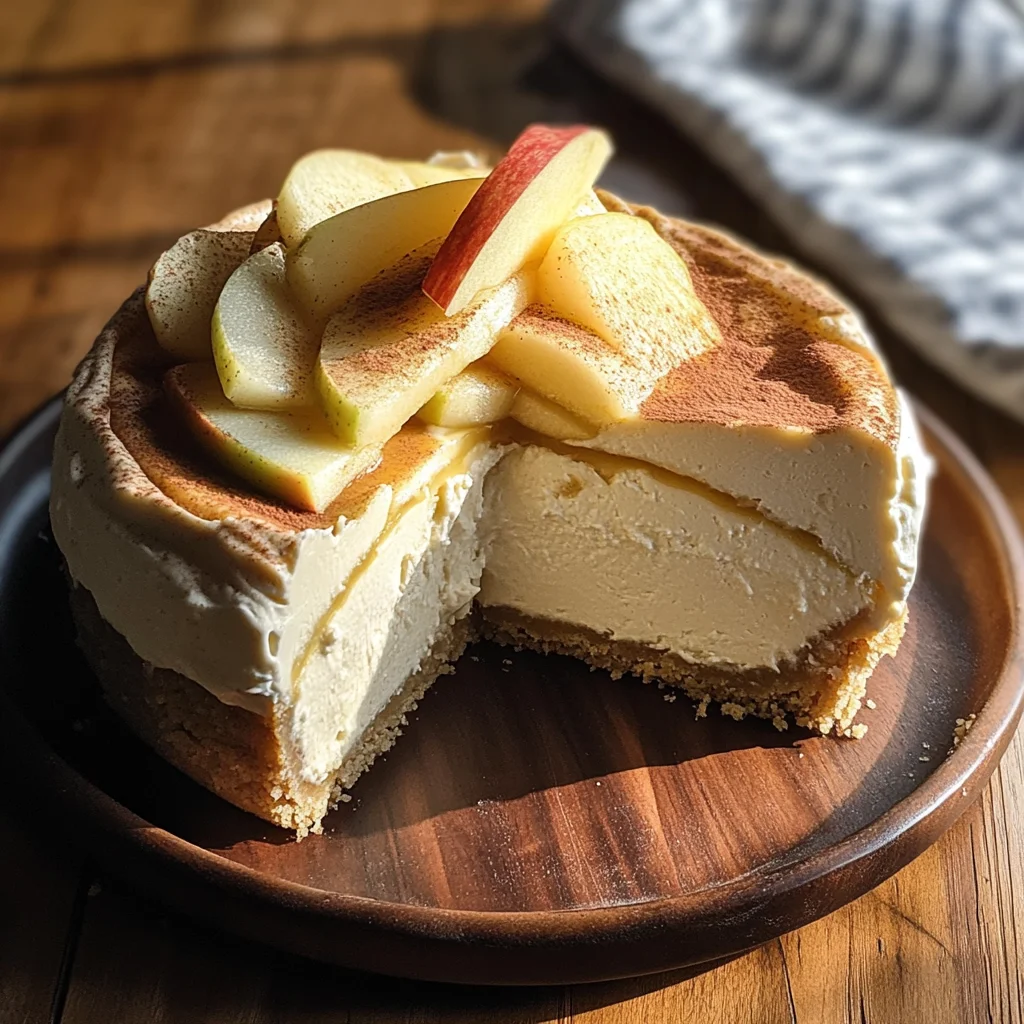
Apple Cider Cheesecake
If you’re looking for a dessert that embodies the cozy essence of fall, this Apple Cider Cheesecake is just what you need! The creamy texture paired with the tangy apple flavor makes it a delightful treat for any occasion. Whether you’re hosting a family gathering or simply want to indulge on a busy weeknight, this cheesecake will warm your heart and impress your taste buds.
What makes this recipe extra special is the use of fresh apple cider, which adds an autumn-like twist to a classic dessert. Each bite is like a hug from your favorite sweater, and I can’t wait for you to try it!
Why You’ll Love This Recipe
- Easy to make: With straightforward steps, you’ll find that baking this cheesecake is simpler than you might think!
- Perfect for sharing: This cheesecake serves many, making it ideal for gatherings or potlucks.
- Flavorful and unique: The combination of apple cider and mulling spices creates a flavor profile that’s both familiar and exciting.
- Make-ahead goodness: Prepare it the night before and let it chill in the fridge—less stress on the day of your gathering!
Ingredients You’ll Need
These ingredients are simple and wholesome, making it easy to whip up this delicious Apple Cider Cheesecake. Gather these items, and let’s get started!
For the Crust
- 2 cups digestive cookies or graham crackers (270g)
- ½ cup butter (melted) (113g)
- ¼ teaspoon salt
- 2 tablespoons powdered sugar
For the Filling
- 3 cups fresh apple cider (honeycrisp cider is more tart!)
- Mulling spices
- 3 cream cheese bricks (227g each, softened at room temperature)
- 1 cup brown sugar (220g)
- ½ teaspoon salt
- 2 teaspoons pure vanilla extract
- 1 cup sour cream (240g)
- ⅓ cup reduced apple cider (from above)
- 1 teaspoon cinnamon
- 3 large eggs
- 2 tablespoons all-purpose flour
Variations
One of the great things about this Apple Cider Cheesecake is its flexibility! Here are some fun variations you can try:
- Add a layer of caramel: Drizzle some caramel sauce over the top before serving for an extra indulgent treat.
- Swap in different spices: Feel free to experiment with nutmeg or ginger along with or instead of cinnamon for a unique twist.
- Make it mini: Use a muffin tin to create individual cheesecakes that are perfect for parties and easy to enjoy!
- Try different crusts: Substitute the digestive cookies with oreo crumbs or even crushed nuts for a gluten-free option.
How to Make Apple Cider Cheesecake
Step 1: Reduce the Cider
Start by boiling the fresh apple cider with mulling spices in a large pot over high heat. This step is crucial as it concentrates the flavors and transforms the cider into a thick syrup. Allow it to boil for about an hour until you have around ⅓ cup of reduced cider, then set it aside to cool.
Step 2: Preheat Your Oven
Next, preheat your oven to 350°F. This ensures that your cheesecake bakes evenly from the start.
Step 3: Prepare the Crust
In your food processor, pulse together the digestive cookies until finely ground. Then add in melted butter, salt, and powdered sugar. Pulse until everything combines into wet crumbs. Press these crumbs tightly into an 8” round springform pan wrapped in foil or lined with parchment paper. Bake for about 10 minutes; once done, allow it to cool completely before chilling.
Step 4: Mix the Cream Cheese Filling
Lower your oven temperature to 325°F. In a stand mixer fitted with a paddle attachment, beat together softened cream cheese and brown sugar until smooth and lump-free. Scraping down the sides occasionally helps achieve that perfect creamy consistency.
Step 5: Add Flavorings
Now it’s time to add in sour cream, vanilla extract, salt, cinnamon, and your previously reduced apple cider. Beat again until everything is well combined—you want this mixture to be incredibly creamy!
Step 6: Incorporate Eggs and Flour
Gently add in three large eggs and flour to your creamy mixture. Beat just until combined—overmixing can lead to cracks in your cheesecake later!
Step 7: Bake It Up
Place your cheesecake pan inside a larger baking dish filled with hot water (this helps keep moisture in). Pour your filling into the crust and bake for about 90 minutes. You’ll know it’s done when the edges look set but the center still has a slight wobble.
Step 8: Cool Gradually
Turn off the oven but leave your cheesecake inside. Crack open the oven door slightly using a wooden spoon and let it cool gradually for about 30 minutes—this helps prevent cracking.
Step 9: Chill Before Serving
Once cooled slightly on the counter, transfer your cheesecake to the fridge where it should chill for at least eight hours before serving. This waiting period allows all those wonderful flavors to meld beautifully!
Enjoy each slice as you share this cherished recipe with friends and family!
Pro Tips for Making Apple Cider Cheesecake
Making a cheesecake can be daunting, but with a few helpful tips, you’ll be on your way to creating a delicious masterpiece!
-
Use room temperature ingredients: Starting with cream cheese and eggs at room temperature ensures a smoother batter, which helps avoid lumps and results in a creamy texture.
-
Don’t overmix the batter: Once you add the eggs, mix just until combined. Overmixing can incorporate too much air, leading to cracks in your cheesecake as it bakes.
-
Bake in a water bath: This technique helps maintain an even temperature and moisture level while baking, preventing the cheesecake from drying out or cracking.
-
Cool gradually: Allowing the cheesecake to cool slowly in the oven prevents sudden temperature changes that can cause it to crack.
-
Chill overnight: Giving your cheesecake ample time to chill allows the flavors to meld beautifully and makes slicing much easier.
How to Serve Apple Cider Cheesecake
Serving your Apple Cider Cheesecake is just as fun as making it! With a little creativity, you can turn this delightful dessert into a showstopper for any gathering.
Garnishes
- Whipped cream: A dollop of freshly whipped cream adds a light and airy touch that complements the cheesecake’s richness.
- Caramel drizzle: A warm drizzle of caramel sauce offers an irresistible sweetness that pairs perfectly with the apple flavor.
- Cinnamon dust: Lightly sprinkle ground cinnamon on top for an aromatic finishing touch that enhances the fall vibe.
Side Dishes
- Spiced apple slices: Thinly sliced apples tossed in cinnamon and sugar bring freshness and balance to the rich cheesecake.
- Vanilla ice cream: A scoop of creamy vanilla ice cream provides a lovely contrast in temperature and texture while enhancing the overall flavor experience.
- Coffee or chai tea: Serving your cheesecake alongside a warm cup of coffee or spiced chai tea not only warms hearts but also complements the dessert’s autumnal flavors beautifully.
- Candied nuts: A small bowl of candied pecans or walnuts adds an extra crunch and unexpected sweetness that elevates each bite of cheesecake.
With these tips and serving ideas, your Apple Cider Cheesecake will not only taste amazing but will also look beautiful on any table. Enjoy every delicious moment!

Make Ahead and Storage
This Apple Cider Cheesecake is perfect for meal prep, allowing you to enjoy a delightful dessert without the last-minute rush. You can easily store it or even freeze it for later enjoyment.
Storing Leftovers
- Store cheesecake slices in an airtight container in the refrigerator for up to 5 days.
- Place parchment paper between layers of cheesecake slices to prevent sticking.
- Always ensure the cheesecake is fully cooled before storing to maintain its texture.
Freezing
- Wrap the cheesecake tightly in plastic wrap and then in aluminum foil for extra protection.
- Freeze for up to 3 months. For best quality, slice it before freezing so you can enjoy individual portions easily.
- When ready to enjoy, transfer to the fridge and let it thaw overnight.
Reheating
- Cheesecake is best enjoyed chilled, but if you prefer it at room temperature, let it sit out for about 30 minutes before serving.
- Avoid reheating in the microwave as this can alter its creamy texture.
FAQs
Here are some common questions about making and enjoying your Apple Cider Cheesecake.
Can I use store-bought apple cider instead of fresh?
Absolutely! Just ensure it’s a high-quality apple cider to capture that delicious autumn flavor in your Apple Cider Cheesecake.
How do I know when my Apple Cider Cheesecake is done baking?
The edges should look set while the center remains slightly wobbly. It will continue to firm up as it cools!
What can I serve with Apple Cider Cheesecake?
Consider pairing it with whipped coconut cream or a scoop of dairy-free vanilla ice cream for an extra treat!
Can I make this Apple Cider Cheesecake ahead of time?
Yes! It actually tastes better after chilling in the fridge for at least 8 hours, making it perfect for preparing in advance.
Is there a substitute for sour cream in this recipe?
Greek yogurt works wonderfully as a substitute if you’re looking for a lighter option while keeping that creamy flavor intact.
Final Thoughts
This Apple Cider Cheesecake is not just a dessert; it’s a celebration of fall flavors that brings warmth and joy with every bite. I hope you find joy in making this delightful treat and that it becomes a favorite at your gatherings. Enjoy every moment and share with loved ones—after all, great food is meant to be shared!
Apple Cider Cheesecake
Indulge in the comforting flavors of fall with this delightful Apple Cider Cheesecake. This creamy dessert features a luscious filling made from fresh apple cider, combined with rich cream cheese and warming spices, making it a perfect treat for gatherings or cozy nights at home. The buttery crust holds everything together, while the addition of mulling spices elevates this classic cheesecake to new heights. Whether you’re serving it at a holiday dinner or simply enjoying a slice after dinner, this cheesecake is sure to impress!
- Prep Time: 30 minutes
- Cook Time: 90 minutes
- Total Time: 2 hours
- Yield: Serves approximately 12 slices 1x
- Category: Dessert
- Method: Baking
- Cuisine: American
Ingredients
- 2 cups digestive cookies or graham crackers
- ½ cup butter, melted
- ¼ teaspoon salt
- 2 tablespoons powdered sugar
- 3 cups fresh apple cider
- Mulling spices
- 3 bricks cream cheese, softened
- 1 cup brown sugar
- ½ teaspoon salt
- 2 teaspoons pure vanilla extract
- 1 cup sour cream
- ⅓ cup reduced apple cider
- 1 teaspoon cinnamon
- 3 large eggs
- 2 tablespoons all-purpose flour
Instructions
- Reduce fresh apple cider with mulling spices in a pot until thickened; set aside to cool.
- Preheat oven to 350°F (175°C) and prepare the crust by mixing ground cookies with melted butter, salt, and powdered sugar; press into an 8” springform pan and bake for 10 minutes.
- Lower oven temperature to 325°F (160°C). In a mixer, beat softened cream cheese and brown sugar until smooth. Add sour cream, vanilla, salt, cinnamon, and reduced apple cider; mix until creamy.
- Gently incorporate eggs and flour until just combined.
- Pour filling into cooled crust and bake in a water bath for about 90 minutes until edges are set but center wobbles slightly.
- Gradually cool in the oven for 30 minutes before chilling in the fridge for at least eight hours.
Nutrition
- Serving Size: 1 slice (120g)
- Calories: 320
- Sugar: 24g
- Sodium: 230mg
- Fat: 20g
- Saturated Fat: 10g
- Unsaturated Fat: 9g
- Trans Fat: 0g
- Carbohydrates: 32g
- Fiber: 1g
- Protein: 4g
- Cholesterol: 75mg